Simple Book Repair Manual
Date2019
RepositoryDigital by Dartmouth Library
Access and Usage RightsThis work is licensed under a Creative Commons Attribution 4.0 International License. The web version of the Simple Book Repair Manual was created by members of Preservation Services, Dartmouth College Library in 1996 and revised in 2019. The Board of Trustees of Dartmouth College, Hanover, New Hampshire holds copyright. Permission for reuse is granted under limitations of this Creative Commons license.
Table of Contents
- Introduction
- Reference
- Repairs
Acknowledgements
The following people and sources have been particularly helpful in assembling
this Simple Book Repair Manual and subsequent web document when it was created
in 1996.
- •Philip Cronenwett, Dartmouth College Special Collections Librarian, and Bonnie Wallin, Special Collections Assistant, provided the initial training workshops and follow-through critiquing the workshop participants' repairs. They have also made themselves available for consultation.
- •Northeast Document Conservation Center (NEDCC) provided documentation, training materials, and hands-on experiences as part of the Preservation Administrator's Program.
- •Participants in the Simple Book Repair Experimental Project have provided feed-back on the clarity of procedures and excellent ideas for improving the training program.
- •Under the guidance of Patricia Erwin-Ploog, who envisioned its use as a multimedia training tool, the Preservation Committee created the Simple Book Repair Manual and wrote the grant application which secured funding for the project.
- •Staff of Preservation Services created and designed the web site and all accompanying graphic materials. Laura Ward was responsible for transforming the text to HTML and for graphic design; Brian Markee for all photographs and video, and Barb Sagraves for overall design and content accuracy.
- •Information Systems staff provided training and support in transforming the manual into HTML and Claire Packard in the Administrative Office re-keyed the document when technology failed.
Funding for this web site was provided by the National Park Service's National
Center for Preservation Technology and Training and Dartmouth College Library.
NCPTT's Preservation Technology and Training Grants program develops partners in
non-profit organizations, universities and government agencies throughout the
United States to complete critical preservation work and lends significant
support to cutting-edge developments in the conservation and preservation
community.
Website contents are solely the responsibility of the Preservation Services
staff and do not necessarily represent the official position or policies of the
National Park Service or the National Center for Preservation Technology and
Training.
Acknowledgments for 2019 revision:
Madeline Miller, Edward Connery Lathem ’51 Digital Library Fellow, served as
project lead to revise The Simple Book Repair Manual during her 2018-2019
fellowship. She was assisted by members of Preservation Services including
Lizzie Curran, Deborah Howe, Jenny Mullins, and Barb Sagraves. Their work
included content review, staging updated photography, and the addition of video
instruction. TEI encoding instruction was provided by Mina Rakhra of Metadata
Services. Jen Green, Scholarly Communication Program, advised on copyright.
Filming, video editing, and photographic support was provided by Analisa
Goodmann, Jones Memorial Digital Media Fellow.
Back to Table of Contents
Purpose of In-House Book Repair
Conservation of a library’s circulating or general collections is a necessary and
key collection management activity as well as a hallmark of an effective
preservation program. This manual has been written to provide guidelines for
selecting appropriate candidates for in-house book repair and introduce staff to
some repair methods.
In-house book repair is appropriate for general collections materials not needing
complete rebinding by a commercial binding service. The advantages of repairing
materials in-house are that high use materials can be returned to the stacks
more quickly and simple repairs may often be done more economically. These
advantages must be weighed against the cost in time for staff to develop an
acceptable level of book repair expertise. Additionally, simple book repair
treatment, while a single activity, is based upon a series of preservation
decisions that exist in the framework of an academic library’s collection
development and management strategy. For the purposes of this manual, the focus
will be on simple book repair; that is, those repairs that are most easily
completed in-house on non-brittle books, by staff with a good understanding of
book repair.
Back to Table of Contents
Identifying Repairable Materials
A typical hard cover or soft cover book will need attention at several stages in
its library life, from minor mending to rebinding, and even boxing or digitizing
when the paper becomes too brittle to repair or use.
This manual will primarily focus on minor mending techniques that will extend
access to the original book, in addition to addressing damage that impedes the
use of the book.
Working Definition of a Simple Book Repair:
For the purpose of this manual and as a working definition for the Dartmouth
College Libraries general collections, simple book repairs, as part of a
collection management strategy, meet any of the following criteria:
- •The repair can be done by staff who have completed training in simple book repair and have equipment and supplies.
- •The damaged book is needed by a patron and/or is a reserve book for a class and is therefore a “rush” treatment.
- •The book is not brittle. (Brittle books should not be repaired but reviewed by a subject specialist for permanent retention.)
How Books Appropriate for In-House Repair Are Identified
Damaged books may be identified by both library staff and patrons. To make the
decision to repair a book in-house requires that staff members involved in the
process be familiar with and understand the implications of treatment and other
options available. If the over-arching goal of preservation is access, then book
repair becomes one option for providing access to a particular book. Other
options commonly available are: ordering a replacement copy of the damaged book
if available, sending the book for binding by a commercial vendor, reformatting
the book by digitization, or boxing the book. In some situations, it may be
better to permanently withdraw the book from the collection and rely on
interlibrary loan. This decision must be made by a subject specialist. Each
option has a cost, both in staff time and materials. There are no hard and fast
rules for making these decisions, rather, a number of factors should be
considered by staff. Some common questions you might ask before repairing a
book:
Subject Specialists
- •Is the damaged book worth retaining? Does it support curricular or research needs?
- •Is the book widely available through an interlibrary loan service?
- •Is the subject covered by a long-term retention/shared print agreement with other libraries?
- •Would Special Collections be interested in the book?
- •If the book is still available for purchase, is the cost of ordering a new book less than the cost of repairing the original?
At the Circulation Desk
- •Is the book needed immediately by a patron?
Preservation Services
Back to Table of Contents
- •Is the book needed immediately by a patron?
- •Is the book brittle?
- •Is the repair simple?
- •Do I have time, training, and supplies needed to complete the repair?
- •Is the damage so extensive that it should be sent the book to a commercial binding vendor for treatment?
Guiding Principles of Book Repair
Reversibility: Any treatment applied to a book should be
reversible, meaning it can be undone easily at a later date. In reality, only an
enclosure of a book (as in boxing) is truly reversible.
Do No Harm: This is a corollary to reversibility. If a
repair seems difficult or you think you do not have the skill to complete the
repair do not attempt it. Consult with a subject specialist to determine options
other than repair.
Expediency: Almost any non-brittle book can be repaired,
given enough time and the proper equipment. Simple book repair implies that the
repair will not take hours or days of staff time. As you become more comfortable
with simple book repair, the decision to repair in-house versus sending the book
to a commercial binding vendor will be easier to make.
Back to Table of Contents
In-House Repair Area
Training: This manual outlines 10 repairs that can be
successfully done by staff with proper training and a few supplies. Additional
or more extensive conservation work must be handled by staff trained in book
conservation.
Work Area: The best work area has a large washable table
surface, good task lighting, adequate room to work and a sink nearby. Floors
should be bare or have a standing mat. Proximity to an elevator (if needed), and
circulation services is extremely useful.
Storage: Supplies should be kept in a clean and
well-maintained area, free from dust and away from water or heat sources.
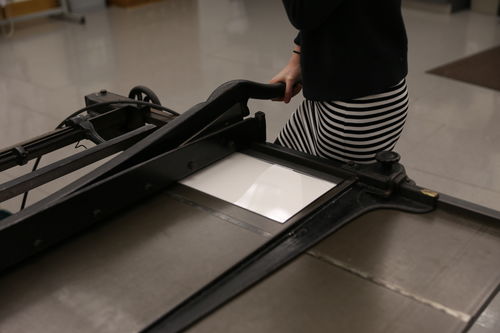
Equipment and Supplies: A section of this manual is
entitled Book Repair Toolbox. It contains a full
list of the most commonly needed equipment and supplies. Equipment, such as book
presses, hand tools, and brushes, should be of good quality and appropriate for
book repair. While the very best equipment and tools may not be necessary, high
end equipment, while initially more expensive, will be a better long-term
investment. A large cutter such as a board shear or cut trimmer are the most
expensive pieces of equipment but will be worth the investment due to the time
saved in increased accuracy and ease of cutting.
Supplies should always be "archival quality". The terms "archival quality" and
"acid free" are frequently used in describing conservation supplies. Briefly,
"archival quality" means lignin free. Lignin is the sticky stuff that makes
plants stand up straight. Archival quality products are also alkaline buffered.
Buffering neutralizes acid AND is a treatment that slows down future
deterioration of an item. The term "acid free" means that the item is pH (7) but
does not have the buffering additive that protects it from acid migration. A
good example of this is using an acid free enclosure to protect a brittle book.
Eventually, the enclosure will also become acidic because it is in contact with
the acidic, brittle book. For that reason an acid free product is not enough, it
must be also be alkaline buffered.
Back to Table of Contents
General Guidelines
- •Keep your repair tools in good repair, clean and well-sharpened.
- •Keep the work area clean. After completing repairs put tools and supplies in their proper storage location.
- •Some of the tools you will be working with are extremely sharp. Please exercise caution. If you do cut yourself, try not to bleed on the books because blood is extremely hard to remove from paper.
- •Always handle materials with clean hands.
- •Batch similar repairs.
- •Do not eat or drink in the repair area.
- •Treatments should be harmonious and aesthetically pleasing if visible.
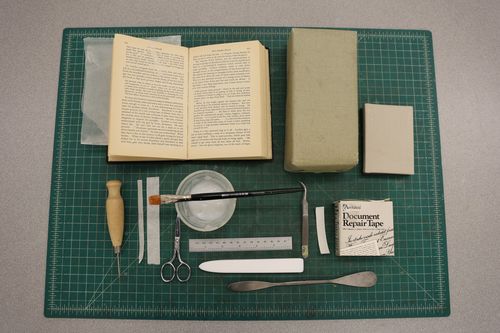
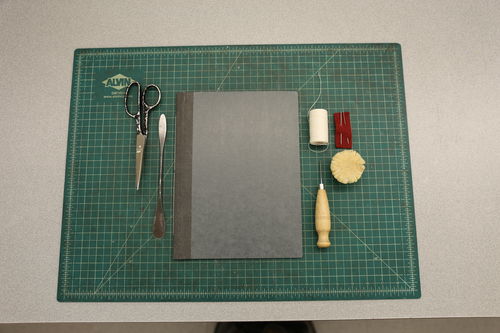
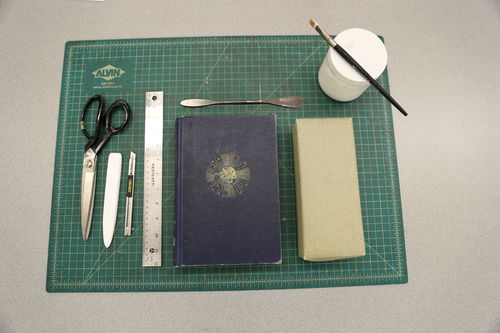
Toolbox
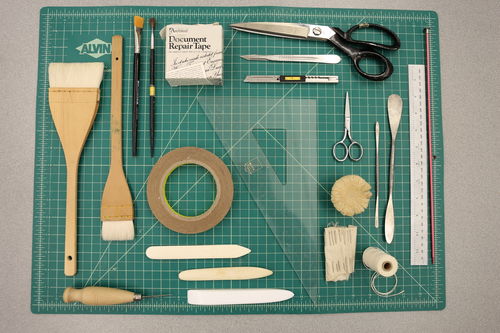
Tool Photos and Descriptions
-
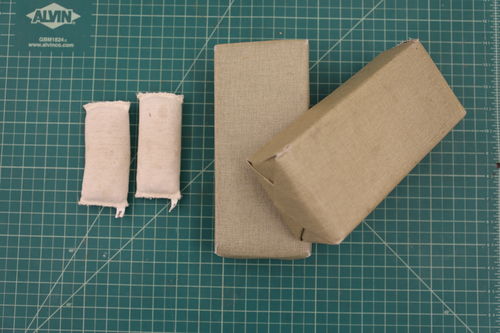
 Acid free pamphlet binder: Available through library supply vendors or can be made in-house. Pamphlet binders are two pieces of firm board connected by a soft cloth spine. Pamphlets and small books can be sewn directly into them.
 -
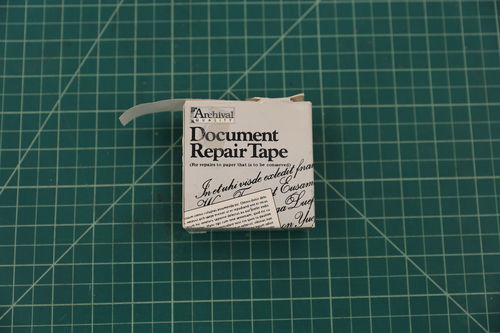 Archival quality repair tape: A clear low-tack tape with paper backing.
 -
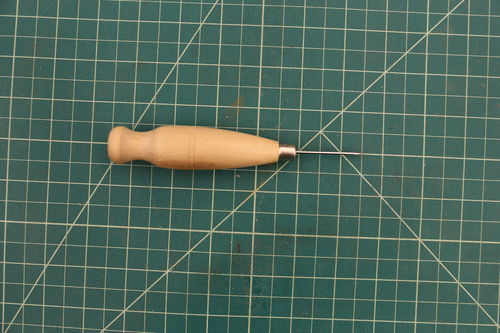 Awl: Wooden or plastic-handled tool with metal point, used for making small holes.
 -
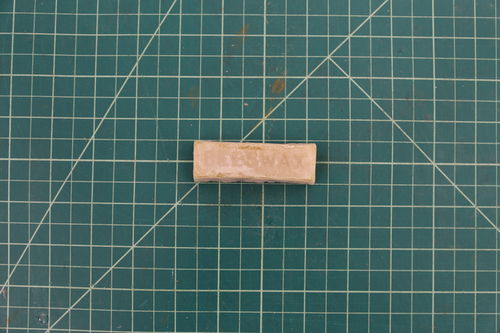 Beeswax: Small bars or cakes of beeswax are used for preparing sewing thread.
 -
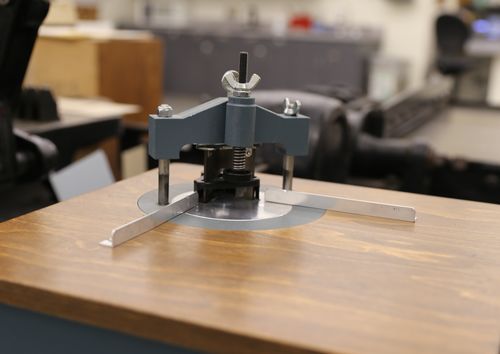
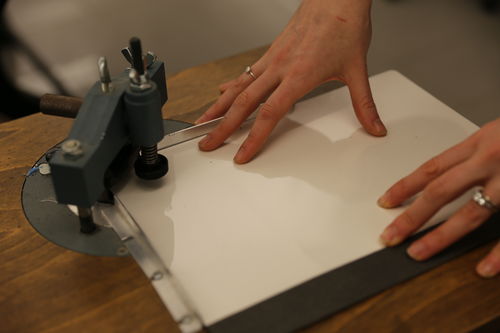
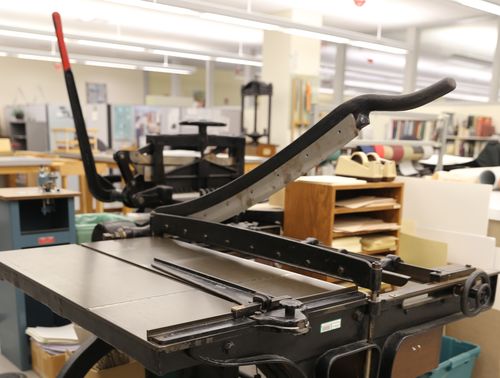 Board shear: A large cast iron cutter that is operated by pushing down a foot pedal to hold the paper or board and pulling down a large blade by a handle. A smaller version of this is a tabletop papercutter.
 -
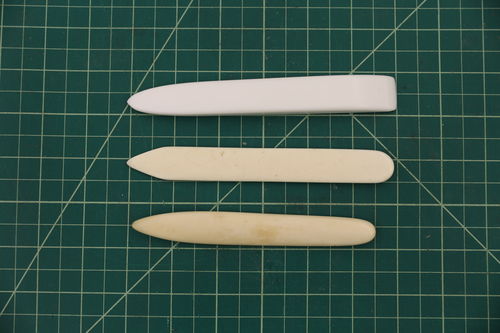 Bone folder: Made out of animal bone or Teflon, a tool with one flat end and one pointed end used to help score and fold paper.
 -
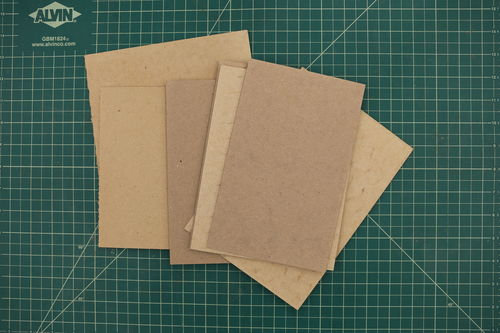 Book board: A thick greyish paper board used to make covers of books.
 -
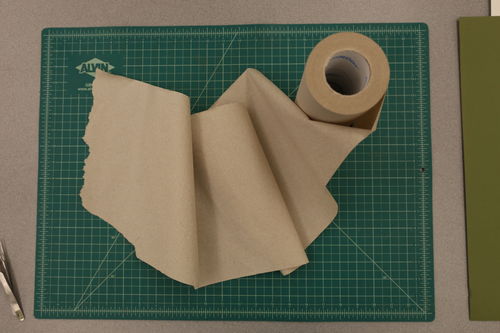
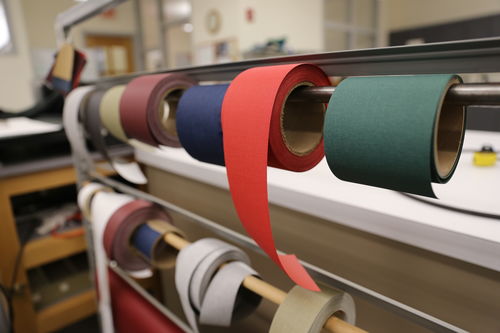 Bookcloth: Starch-filled or backed with paper, bookcloth is a heavy fabric that covers the boards and spine of a book. It is available in rolls or sheets of varying widths depending on the repair demands.
 -
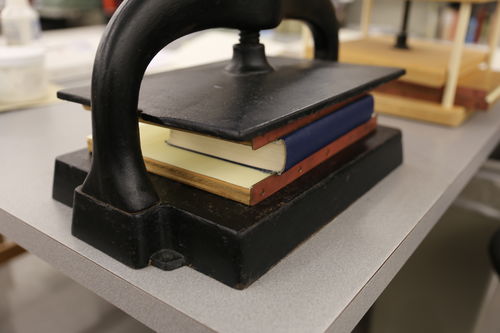
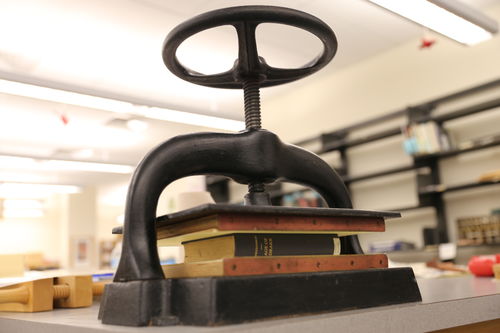
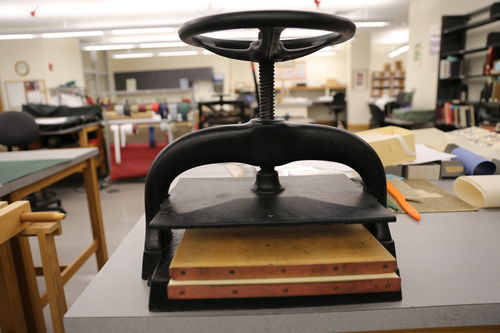 Book press: Adjustable cast iron or wooden platens that press a book flat. If unavailable, pressure can be created by placing a board on top of the book and covered bricks to weight it.
 -
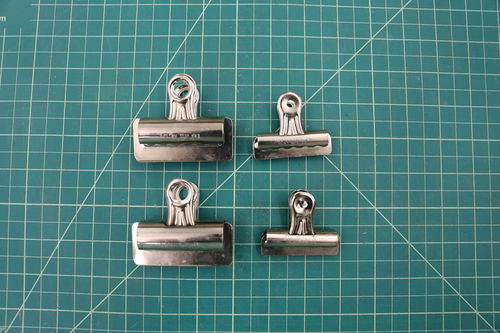 Bull dog clips: Metal clips that have flat jaws, available in a variety of sizes.
 -
 Corner rounder cutter: Used to round the corners of paper and board.
 -
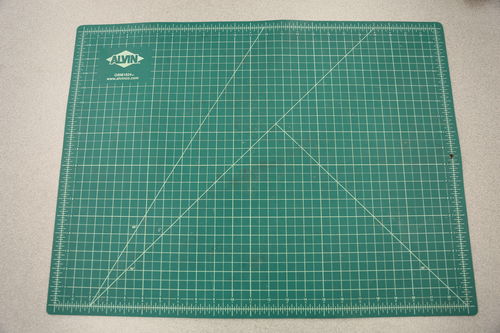 Cutting mat: Soft mats, usually with a measuring grid on them, that protect both the table surface and your knife when cutting.
 -
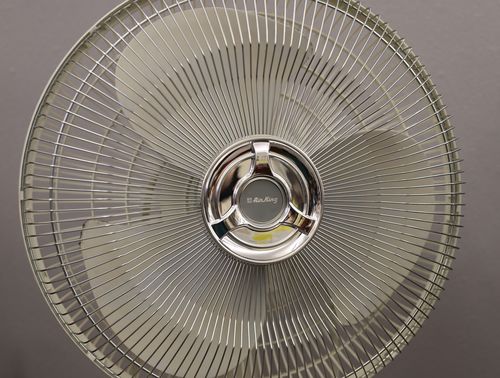 Fan: Either a box fan or a small oscillating fan will be effective in circulating the air around wet collections.
 -
 Japanese tissue: Light weight, long-fibered, neutral colored papers used for mending paper. The long fibers render the paper stronger than Western papers. Most typically used in conservation are Kitikata and Sekishu.
 -
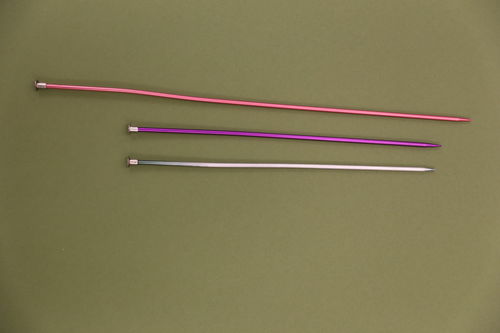 Knitting needles: Long, metal knitting needles, preferably sizes US 6-8.
 -
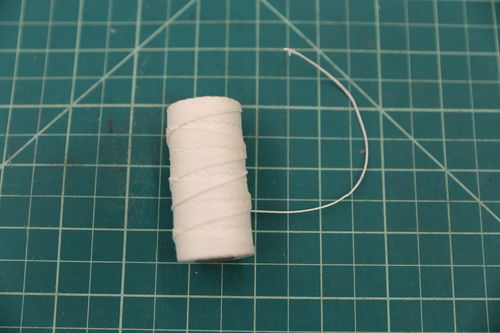 Linen thread: Spool of white, unwaxed thread, size 18/3.
 -
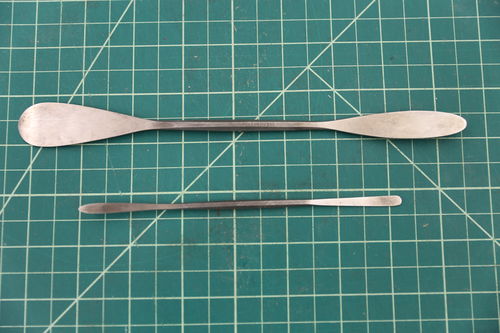 Microspatula: Small metal tool with flat paddle-like ends.
 -
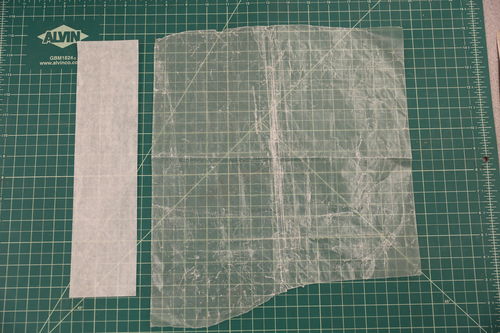
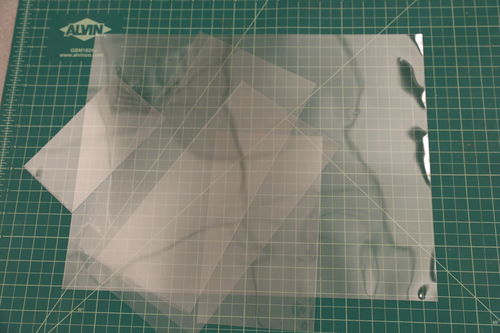 Mylar: A clear, archival polyester film used for making sleeves for paper-based items or used as a moisture barrier when repairing books.
 -
 Paper towels: Conventional paper towels are very useful for mopping excess moisture on wet collections.
 -
 Press boards: Flat wooden or MDF boards (medium-density fiberboard), sometimes with a brass edge, used for securing books in a press.
 -
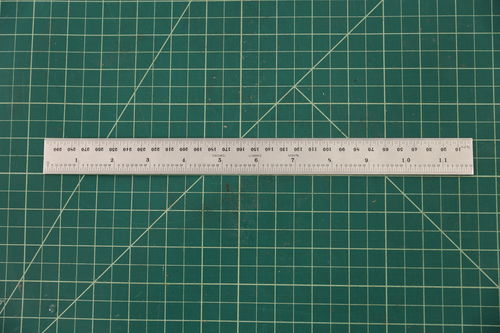 Ruler: Flat, metal rulers with no cork backing are preferable.
 -
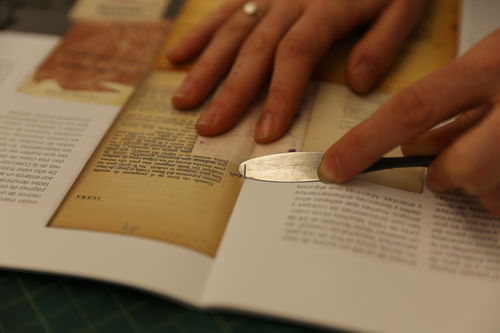
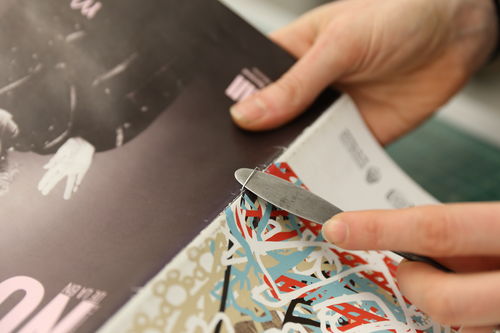
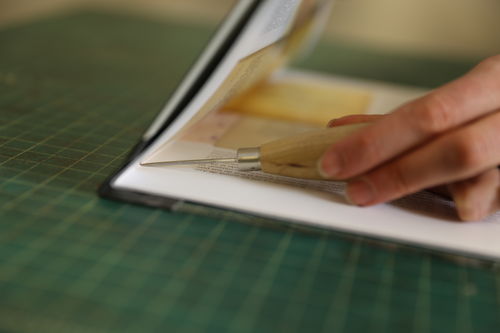
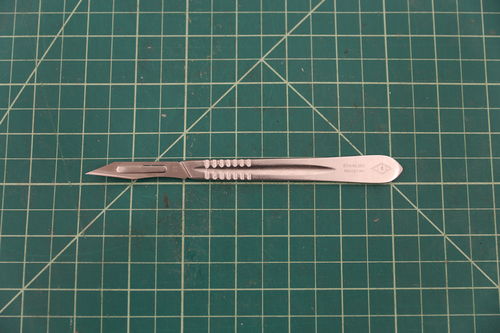 Scalpel: Metal handle with snap-on blades, available from surgical suppliers. Blade sizes more useful are #15 and #25.
 -
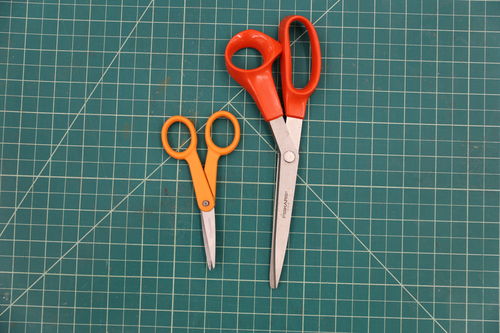 Scissors: Very sharp scissors are a necessity in any book repair!
 -
 Scrap paper: Clean re-cycled paper, blank newsprint, computer printer paper, etc.
 -
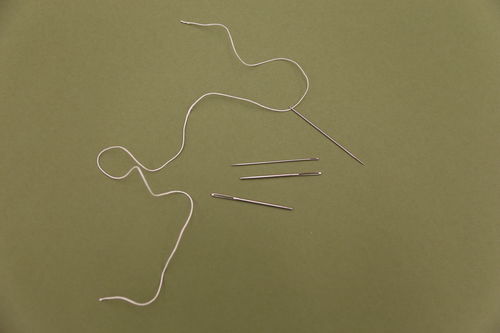 Sewing needles: Any needle that is not blunt and has a large enough eye for the sewing thread will be suitable.
 -
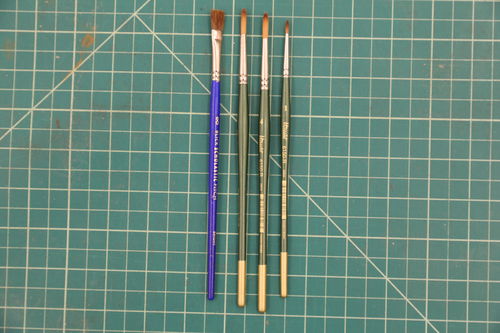 Small brush: A variety of small brushes, both round and flat, are ideal for applying adhesives.
 -
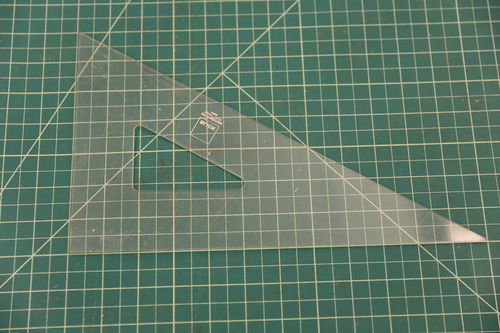 Triangle: Plastic or metal right-angle drafting tool.
 -
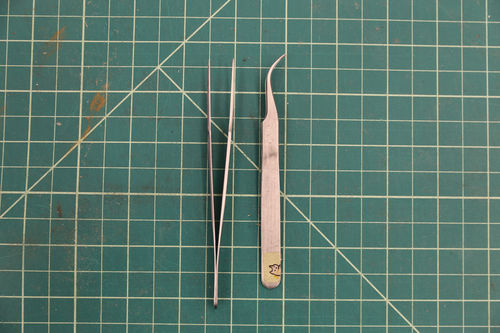 Tweezers: Curved ends are preferable, but any tweezers with delicate ends rather than grippy ones are best.
 -
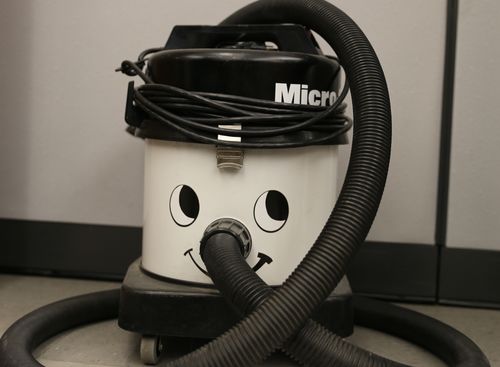 Vacuum: A household vacuum fitted with an upholstery brush will effectively clean books and shelves.
 -
 Wax paper: Household wax paper is an effective moisture barrier for gluing.
 -
 Weights: A variety of weights is helpful; covered bricks, bean bags and sewing weights to name a few. Weights need to be clean, so wrapping them in bookcloth or adhering felt on the bottom is ideal.
 -
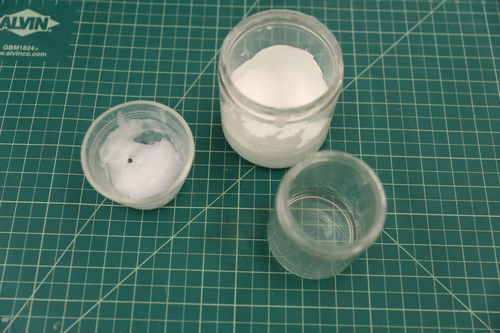 Wheat starch paste, PVA, and methyl cellulose: Commonly used adhesives in book repair. (Show from left to right.)
- •Wheat Starch Paste: Plant based, reversible adhesive weaker than PVA but dries stiffer. Both instant and cooked paste are available.
- •PVA: Polyvinyl acetate, a plastic based adhesive use in book repair. Known for its flexibility and permanence. It can be thinned with water or methyl cellulose before using. Should not be used on rare items where treatment reversibility is important.
- •Methyl Cellulose: Semi-synthetic adhesive that sets slowly and is reversible with water. It is clear in appearance.
-
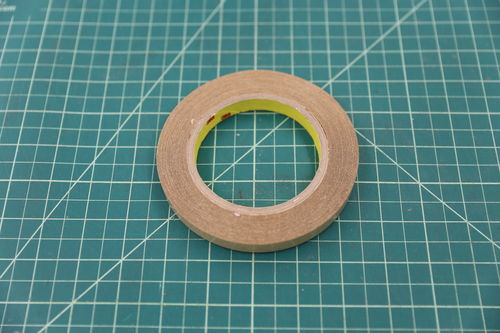 3M #415 Double sided tape: Paper-backed double-sided tape.
 -
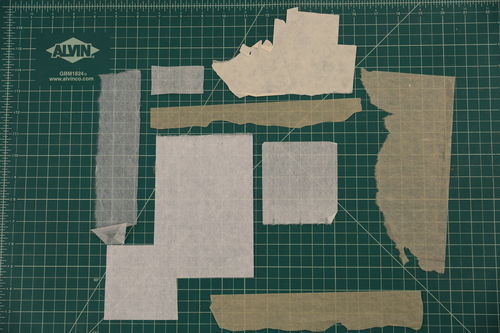
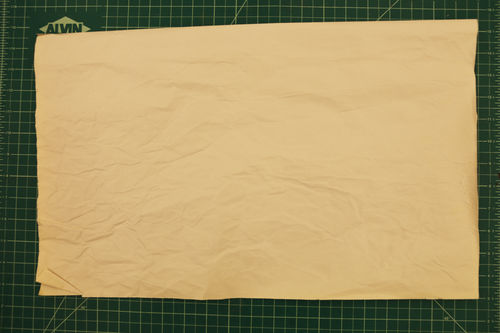
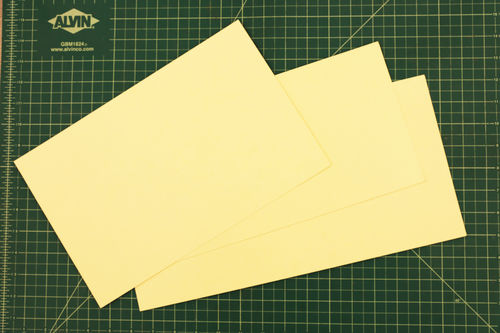 10 pt. Map folder stock: A cardstock-weight (similar to oak tag) paper used for making folders and enclosures.
Parts of a Book and Grain Direction
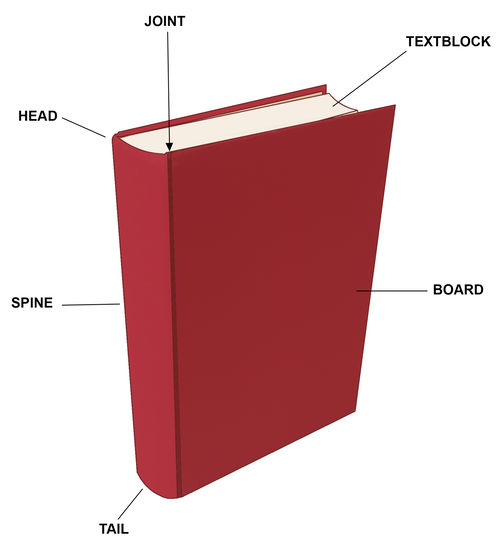
- •Board: The front and back covers of the book.
- •Head: The top of the book.
- •Joint: On the outside of a book, the joint is the space between where the board ends and the spine begins.
- •Spine: The side of the book where the textblock sections are sewn and lined.
- •Tail: The bottom of the book.
- •Textblock: All of the pages of the book between the boards.
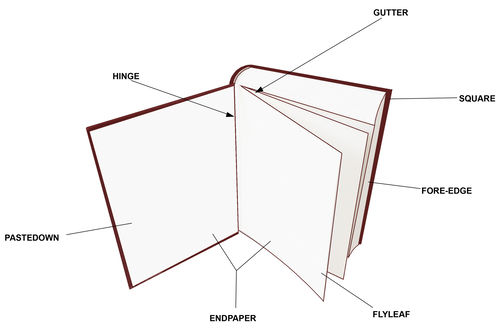
- •Endpaper: The paper at the very beginning and very end of the book with no printing on it. Sometimes these papers are patterned or a different color than the text paper or might occasionally have text if it is a reference manual.
- •Flyleaf: The very first and last pages of the book, opposite the pastedown.
- •Fore-edge: The part of the book that opens; opposite from the spine.
- •Gutter: When a book is open the gutter is the space created between the open pages; the part of the page closest to the spine area.
- •Hinge: Where the flyleaf and pastedown meet.
- •Pastedown: Part of the endpaper adhered directly to the board, opposite the flyleaf.
- •Square: The space of the board exposed around where the textblock sits.
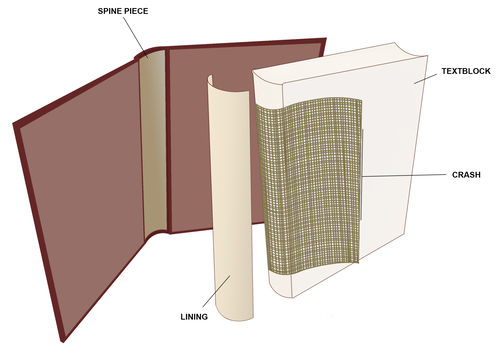
- •Crash: Also called mull or super, crash is a net-like material adhered to the spine of the book and under the pastedowns.
- •Lining: Any kind of paper, cloth, or leather adhered to the spine of the book; it is typically adhered on top of the crash.
- •Spine piece: A spine stiffener made from paper or board that is adhered to the bookcloth and not the textblock.
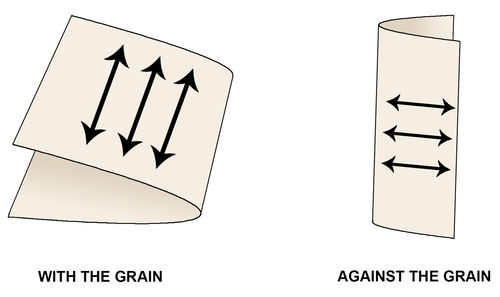
A note on grain direction: Paper and board are made up of
fibers that give it a grain, not unlike wood. It is ideal to use these materials
“grain long” (going vertically, as shown in the diagram) and to always have
grain directions matching when adhering multiple materials together. Using paper
grain long ensures that there is a smoother opening of the book or enclosure,
and that any folds are neat and don’t stress the paper. Check for grain
direction by gently bending (not creasing) a sheet of paper horizontally and
vertically. There will be more resistance in the bend if it is against the grain
of the paper, and less resistance if the bend is parallel to the grain.
Back to Table of Contents
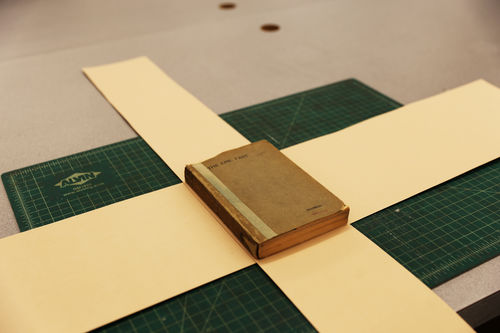
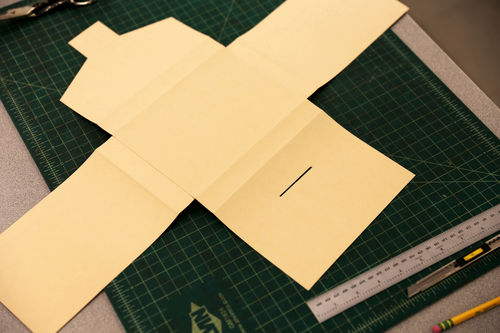
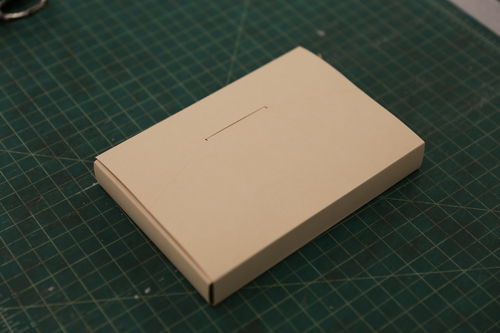
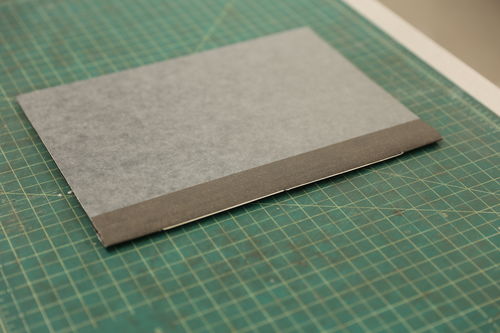
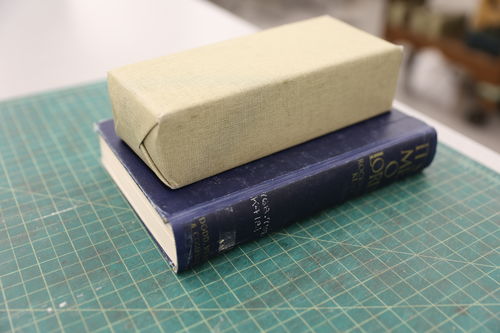
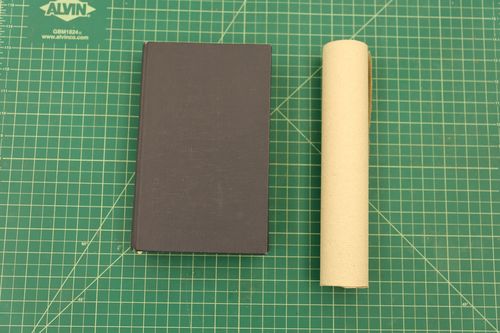
Four Flap Wrapper
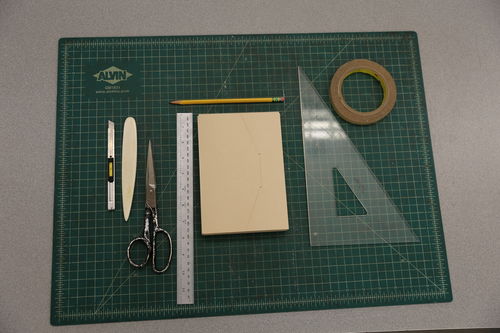
Suggested Equipment and Supplies
Procedure:
*Note: A wrapper is made of two long strips of map folder
stock, folded with the grain (see Parts of a Book) to
enclose the book, and adhered where they overlap to form a box.
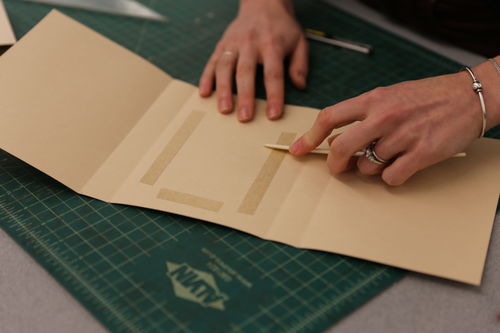
- 1.
Measure the height and width of the book. Cut two strips of map folder stock, one the height of the book (horizontal strip) and the other the width of the book (vertical strip). Each strip should be at least three times longer for each measurement.
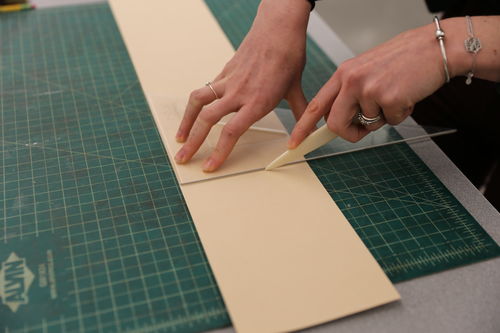
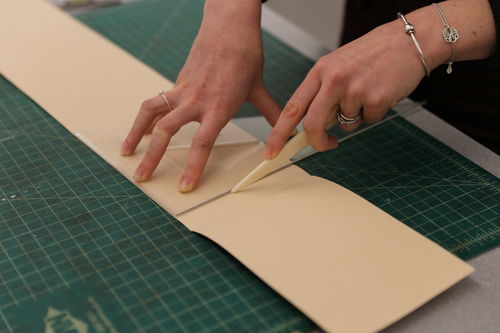
- 2.
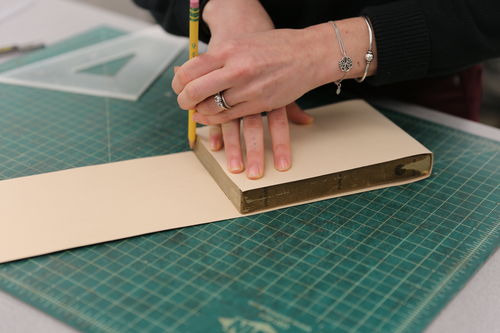
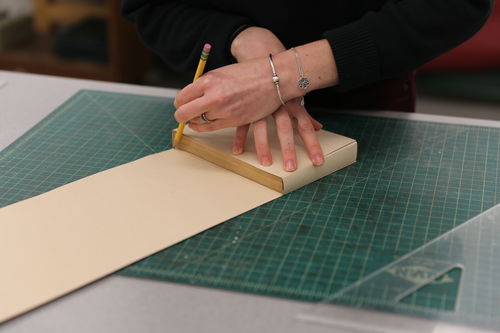
Begin with the vertical strip measured to the width of the book. Place it flat on a table and lay the book on top against the edge. Mark the top edge of the book on the strip with a pencil.

- 3.
Place the triangle along the pencil mark and score the line with the bone folder. Crease the board to make a fold.
- 4.
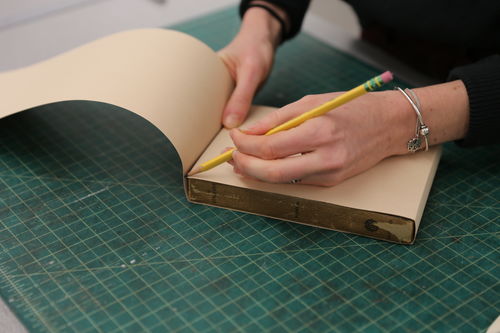
Place the book upright against the newly formed right angle. Mark the edge of the book on the strip with a pencil.

- 5.
Place the triangle along the pencil mark and score the line with the bone folder. Crease the board to make a fold. The bottom of the wrapper is beginning to take shape.
- 6.
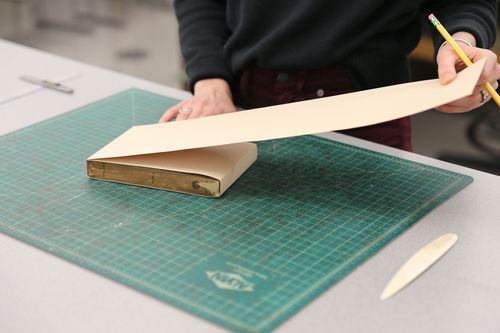
Place the book flat on a table with it snug against the fold. Mark the edge of the book on the strip with a pencil.
- 7.
Place the triangle along the pencil mark and score the line with the bone folder. Crease the board to make a fold.
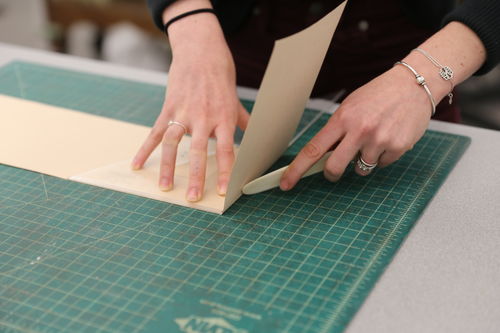
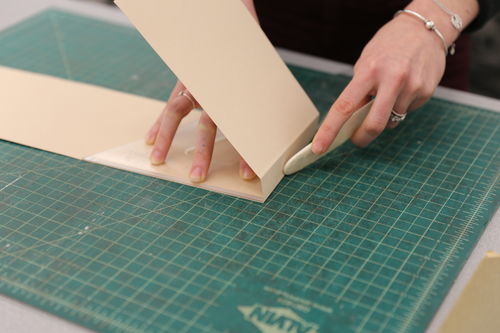
- 8.
Continue until the book is wrapped by the folder stock. Trim the excess.
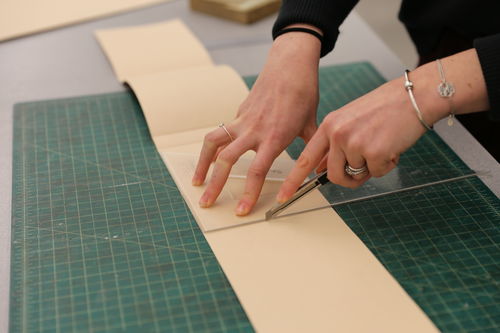 Trimming the excess.
 - 9.
With the vertical wrapper still around the book follow the same procedure with the horizontal strip making creases with the grain. You should finish with two scored pieces of map folder stock. Trim the excess.
 Marking the horizontal strip.
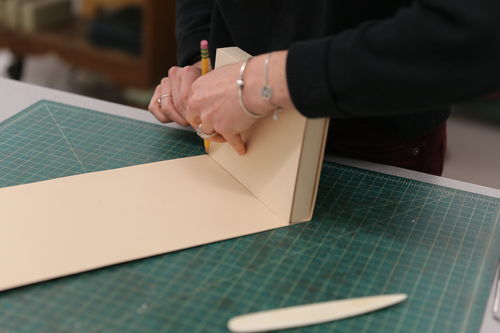 Marking the thickness.
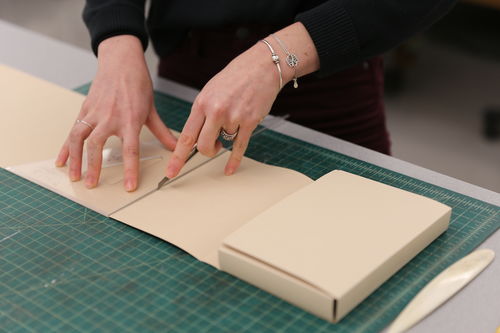 Trimming the excess.
 - 10.
Tape the inside center panel of the horizontal strip with 3M double coated 415 tape. Assemble the two strips as shown.
 Applying the tape.
 Removing the tape backing.
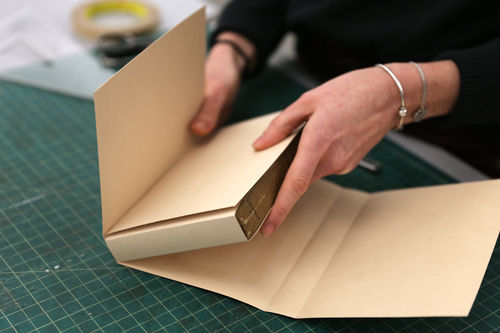 Placing the wrapped book onto the horizontal strip.
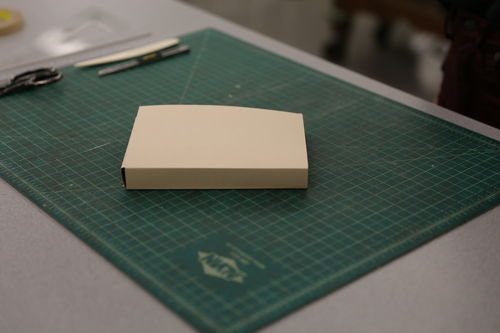 The two strips of map folder stock attached.
 - 11.
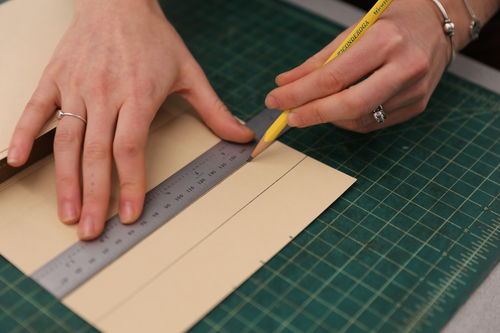
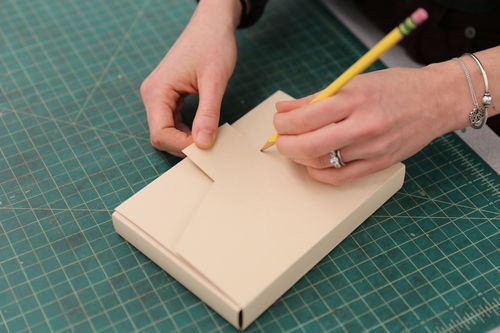
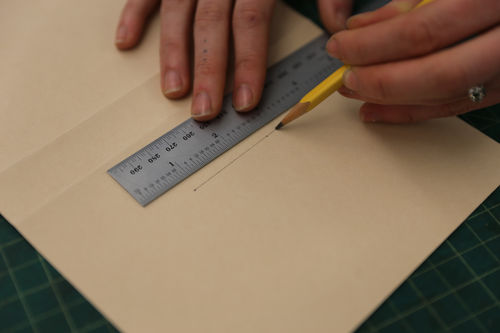
Secure the wrapper by creating a tab out of the horizontal flap. To do this start by measuring the midpoint of the fore-edge of the outer horizontal flap. From the midpoint measure one inch up and one inch down. Mark these points with a pencil.
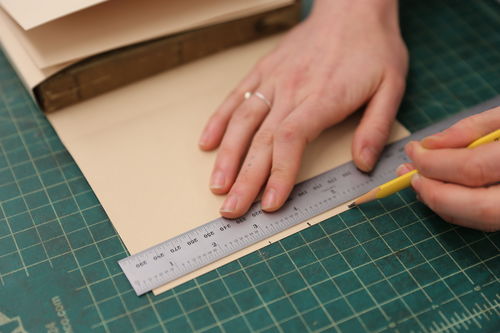
- 12.
On the tail and head of the flap measure two inches and three inches from the fore-edge. (For smaller books use 1 1/2" and 2 1/2"). Draw 2 parallel lines from the top and bottom fore-edge marks, to the first (2") set of marks.
- 13.
Draw angled line from head (3" mark) to top parallel line from fore-edge. Repeat from tail 3" mark.
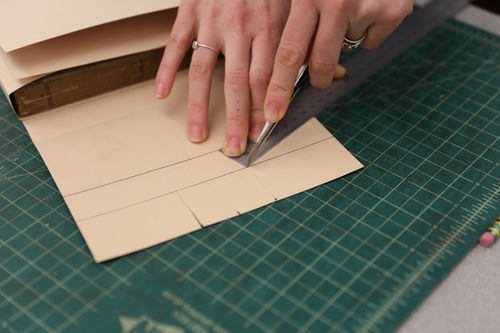
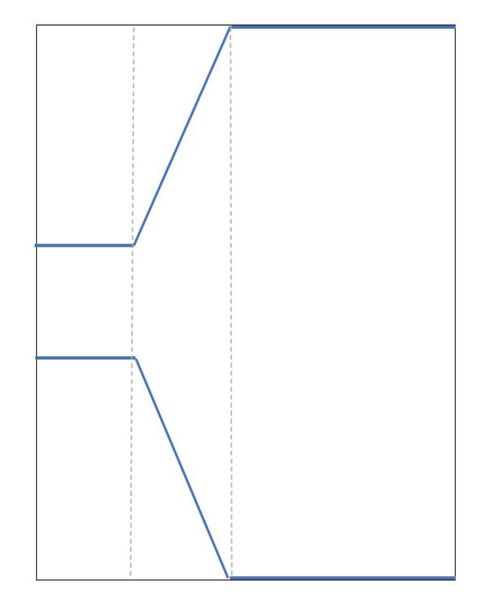
- 14.
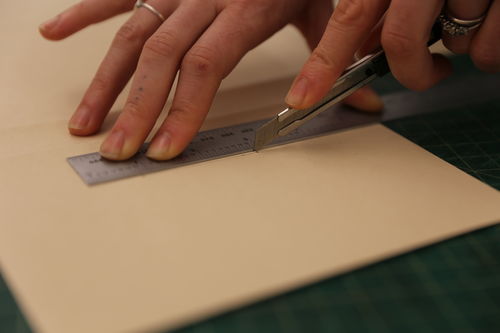
With scalpel and straight-edge, cut along these lines.
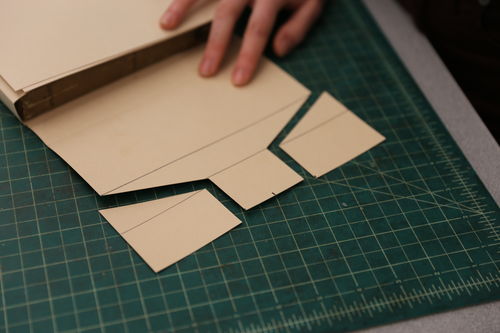
- 15.
Trim 1" off tab. (If small book trim 1/2" to 3/4").
- 16.
Place book in wrapper.
- 17.
Mark top and bottom angled corners of the tab and draw a line between the two.
- 18.
Remove the book.
- 19.
Mark a parallel line 1/8" (toward fore-edge) from the one you just drew.
- 20.
Cut out the sliver of map folder stock to create slot for tab.
- 21.
Replace book and fold shut.
Finished:
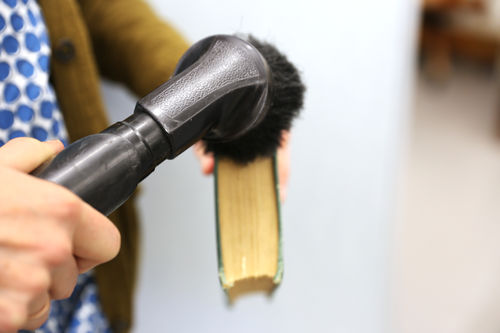
General Cleaning
Suggested Equipment and Supplies
- • Vacuum
Procedure:
This procedure is intended for general cleaning of books that have become dusty
from sitting on shelves. It is ideally done with a vacuum with a low suction so
as to not damage the book.
- 1.
Remove a shelf of books and place on a table or a book cart. Wipe down the shelf before returning books to it.
- 2.
With the book upright and held tightly closed move the nozzle brush from the spine to the for-edge always moving in one direction while cleaning. This ensures that dirt will be pushed toward the outside of the book and not back towards the spine.
 Top
Top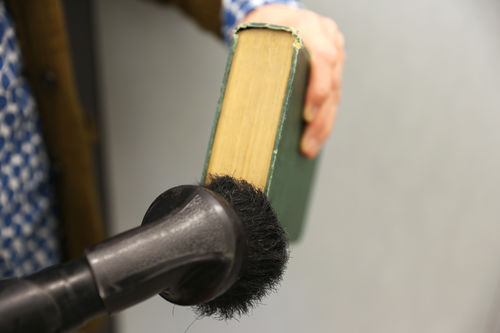 Bottom
Finished:
Back to Table of Contents
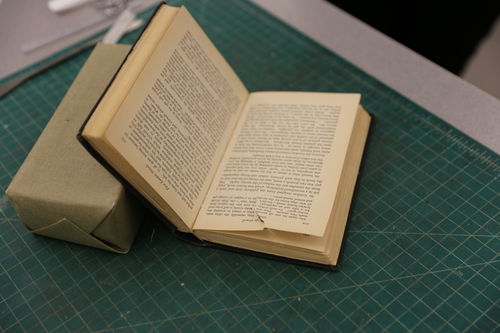
Torn Pages
Suggested Equipment and Supplies
Procedure:
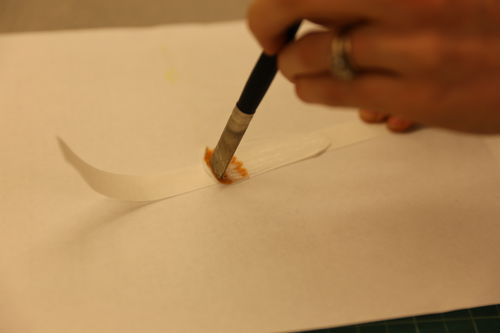
Using Archival Repair Tape:
There are ‘archival’ repair tapes on the market, however these should be used
sparingly as over time they cannot be reversed and can cause further damage.
These tapes may be applicable to high use items needing a quick turnaround or
that have a finite life span such as magazines or textbooks that will not be
permanently retained in the library collection.
- 1.
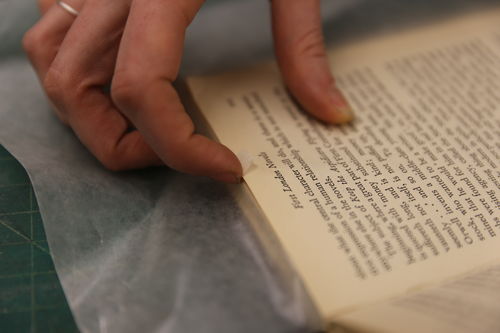
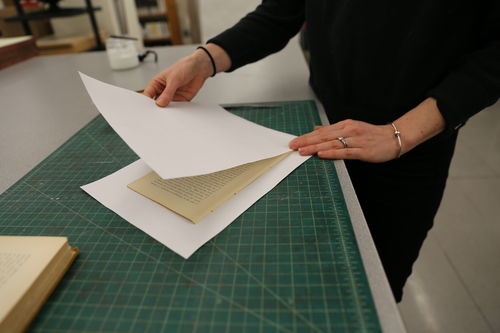
When mending a tear, first determine the correct position for the two sides of the tear to meet. If the tear is long and changes direction, mend only one direction at a time.
 Incorrect
 Correct
 - 2.
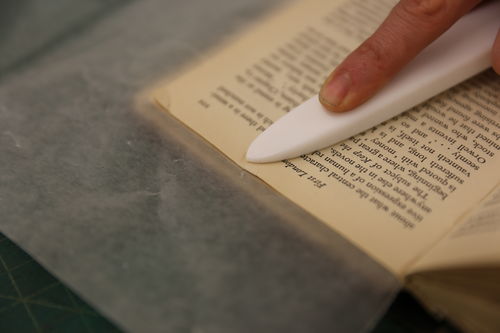
When using the repair tape use only as much as is necessary to cover the tear. You can use scissors to fine tune the amount needed.
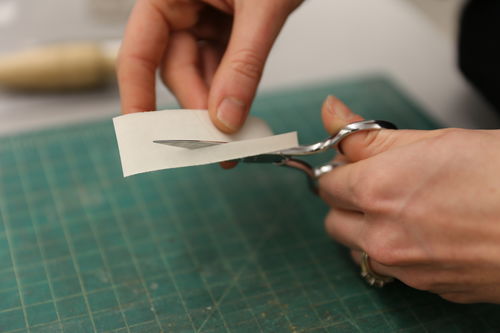
- 3.
Once the tape is placed accurately on the tear rub it with a bone folder.
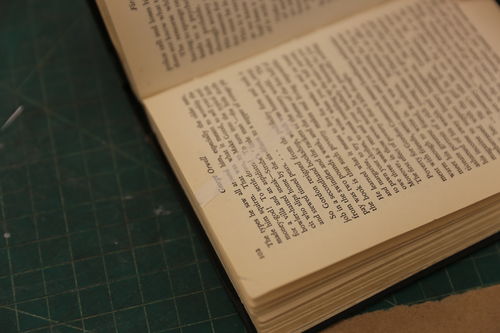
Finished:
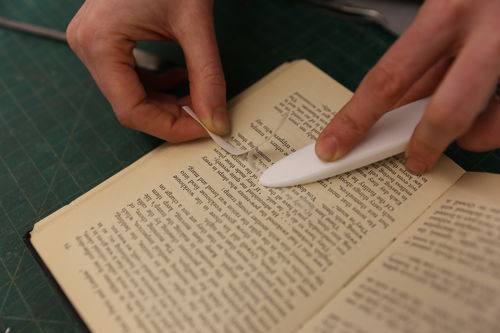
Using Japanese tissue and wheat starch paste:
- 1.
Support the book in such a way that the page in need of repair lays flat.
- 2.
Put a piece of wax paper underneath the page to be repaired.
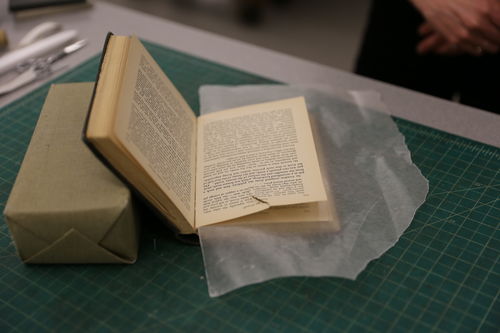
- 3.
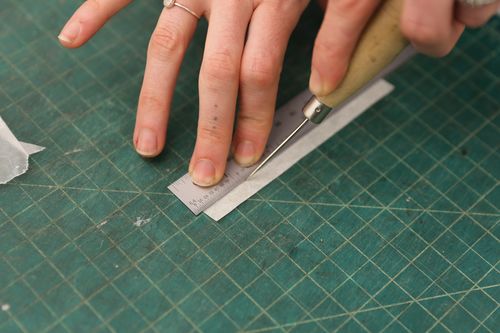
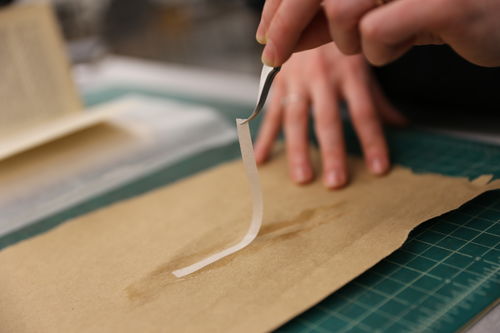
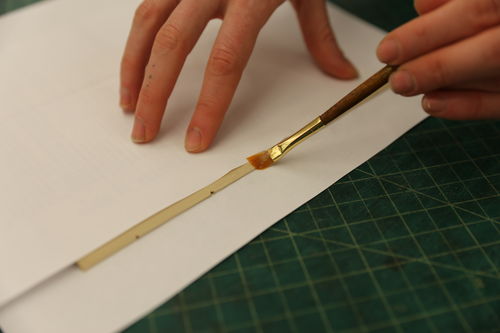
Using Japanese tissue that is slightly lighter in weight than the page being repaired, tear a thin strip along the grain with an awl, slightly longer than the mend needed.

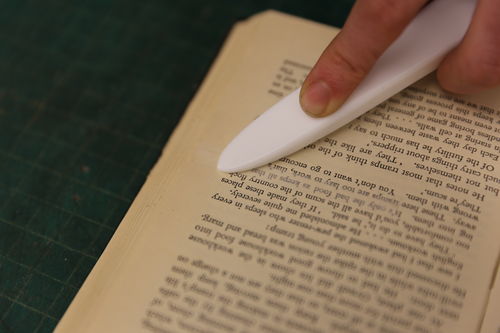
- 4.
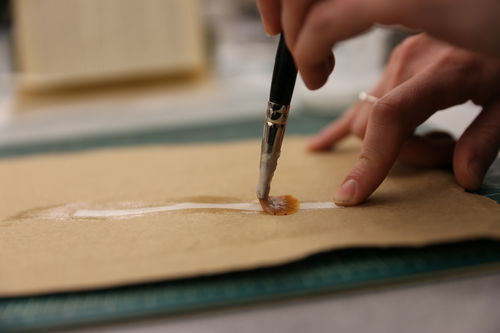
Lay the strip of tissue on a sheet of waste paper and paste out, running your brush in one direction.
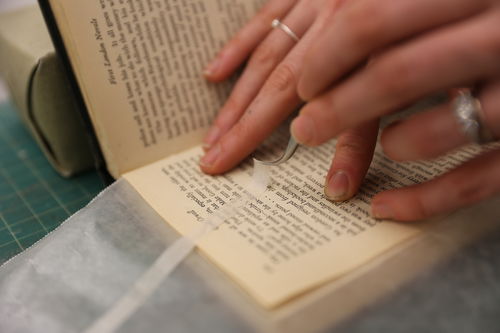
- 5.
Using tweezers gently lift the strip and center it over the tear. Place a piece of wax paper over the mend.
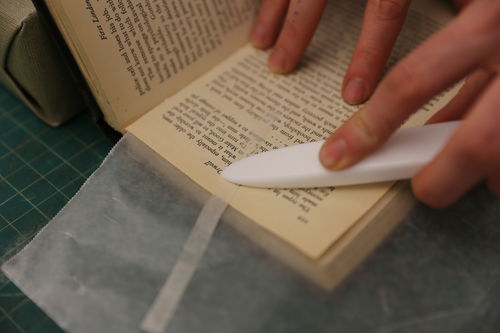
- 6.
Leaving the wax paper in place, put a piece of press board and a small weight on top of the repair and let dry for at least one hour. If the tear extends to the edge of the page, the mending strip should be trimmed to 1/8 inch over the page edge. Add paste to the extended mend strip edge and fold it over the other side of the page.
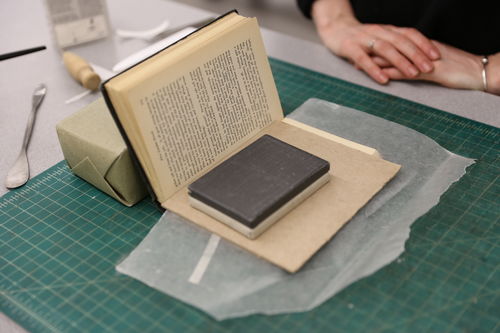

Finished:
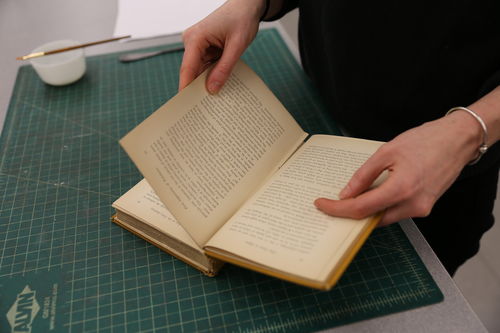
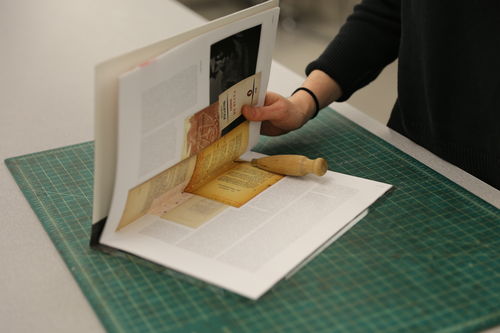
Tipping in a Page
Link to Video
If a page has fallen out or is being replaced, you can reattach it by tipping it
in. In the case of a missing page you may have to find a replacement through
inter-library loan or Google Books. If that happens print the replacement page
on acid-free alkaline buffered paper prior to tipping in.
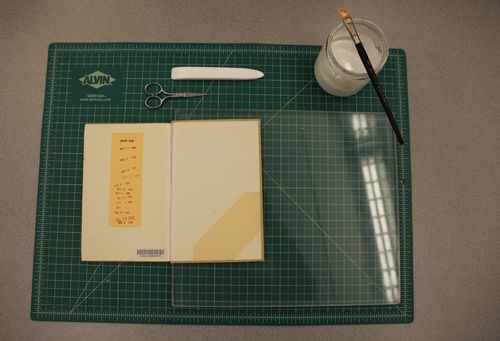
Suggested Equipment and Supplies
Procedure:
In the case of a missing page you may have to find a replacement through
inter-library loan or Google Books. If that happens print the replacement page
on acid-free alkaline buffered paper.
- 1.
Trim replacement page to size of textblock if necessary.
- 2.
Place the page to be tipped in between two sheets of waste paper with approximately 1/8 inch of the inner margin showing. Run a thin line of adhesive along this exposed area. Remove the waste paper.
- 3.
Place the glued edge into the fold of the inner margin of the book where it belongs.
- 4.
Shut the book and allow to dry for an hour.
Finished:

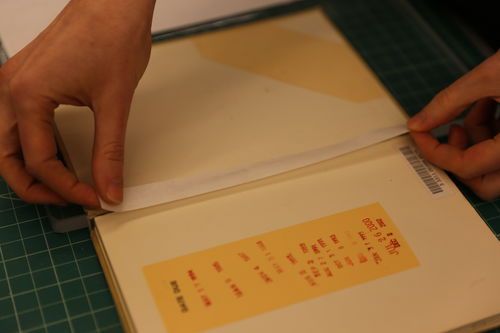
Hinge Repair with Japanese Tissue
Suggested Equipment and Supplies
Procedure:
- 1.
Tighten the hinges if necessary (see Hinge Tightening).
- 2.
Open the board and support it so that it rests parallel to the table top.
- 3.
Place adhesive under the loose flaps of the endpaper. Consolidate loose material into their original positions and rub with bone folder into place.
- 4.
Cut a piece of Japanese tissue to the height of the textblock and wide enough to extend 1/4" onto the pastedown to about 1/8" onto the flyleaf.
- 5.
Paste out the Japanese tissue and position over the hinge area.
- 6.
Lightly bone down the Japanese tissue to ensure that it is well adhered. (A Teflon folder is very useful for this procedure as the Teflon does not drag as much on the wet Japanese tissue.
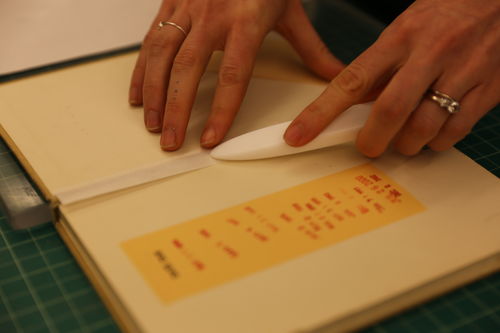
- 7.
Leave open to dry completely.
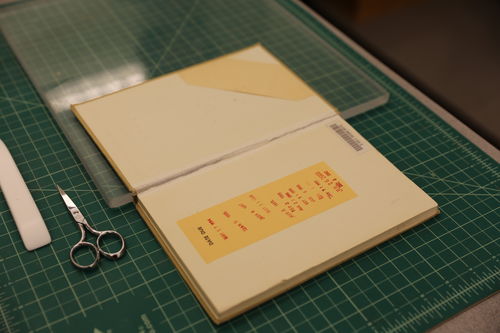
Finished:
Corner Consolidation
Link to Video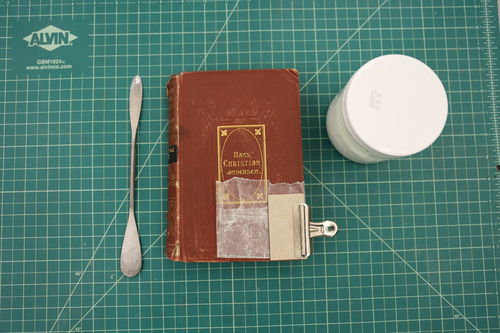
Suggested Equipment and Supplies
Procedure:
- 1.
Fan out layers of the board with the microspatula.
- 2.
Using the microspatula as a brush apply adhesive between the layers of exposed board.
- 3.
Push the layers back together and mold the corner back into shape. Wipe excess glue away immediately.

- 4.
Wrap wax paper around the board edge and sandwich the corner in between two pieces of board. Hold in place with the bull dog clips.
- 5.
Let dry completely.
Finished:
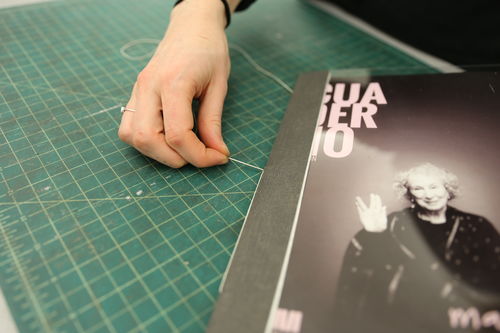
Sewing a Single Signature Pamphlet
Suggested Equipment and Supplies
Procedure:
- 1.
Open the pamphlet to its center and remove staples by unbending the legs of each staple using an instrument with a dull blade such as a knife, staple remover or in this case a microspatula.
- 2.
Slip the blade under each staple along the outside of the spine of the pamphlet, and using a back-and-forth rocking motion, remove the staple.
- 3.
Using a pre-made binder select the size closest to the pamphlet. Trim as needed leaving a 1/4" square on the top, bottom, and fore-edge.
- 4.
Optional: Use a corner rounder cutter to trim the corners for a smooth, rounded edge.
- 5.
Fit the pamphlet inside the pre-made acid free binder and center it.
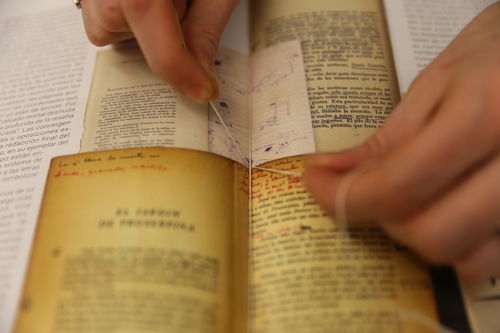
- 6.
Open the pamphlet to the center. With the boards opened 45 degrees or less, punch 3 to 5 holes through the fold in the pamphlet, and its pamphlet binder. The holes at the head and tail should be no more than 1" from top and bottom. The middle hole should be in the center of the pamphlet. It is important to open the pamphlet only part way, so that the awl will pierce it through the fold and not travel off-center.
- 7.
Leave the awl in place at the last piercing.
- 8.
Cut a length of unbleached linen thread, 2-1/2 times the height of the pamphlet binder. Thread the newly cut end into a needle, but do not tie a knot. Leave the ends free.
- 9.
With the pamphlet open only part way, begin sewing from the inside out, through the center hole. (Sewing will proceed more precisely if the tendency to open the pamphlet flat is resisted.) Leave a 3" tail of thread, which can be pulled shorter later.

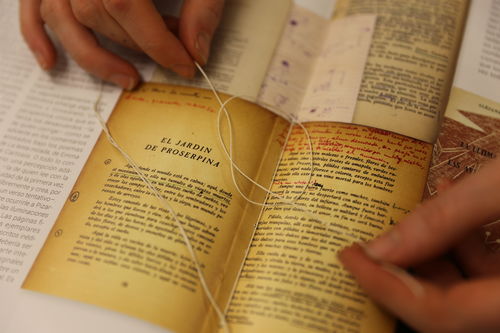
- 10.
Sew back into the pamphlet through the top hole and out again at the bottom hole. Thread should always be tightened in the direction in which the pamphlet is being sewn, pulling parallel to the spine of the pamphlet (not perpendicular). This minimizes the possibility of tearing the folds of the paper.

- 11.
Re-enter at the center hole careful not to pierce the existing thread, always pulling the thread snugly in the direction of the sewing after passing through a hole.
- 12.
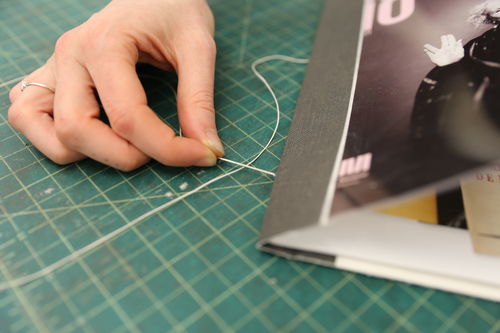
When the sewing is complete, tighten the thread carefully by drawing outermost stitches toward the center of the binder, and pulling up on the ends of the thread making sure the two ends are on either side of the center thread that passes along the fold of the pamphlet. Tie a square knot. Cut the thread-ends to approximately 1/4" to 1/2".Note: For large pamphlets, 5 or 7 sewing holes can be used rather than 3. In all cases the sewing pattern is the same, with the needle passing in and out through every hole--from the middle to the head and down to the tail, skipping the middle hole on the way from one end to the other. Sewing is completed at the center hole where the two ends meet and knotted on the inside.
 Tying a square knot.
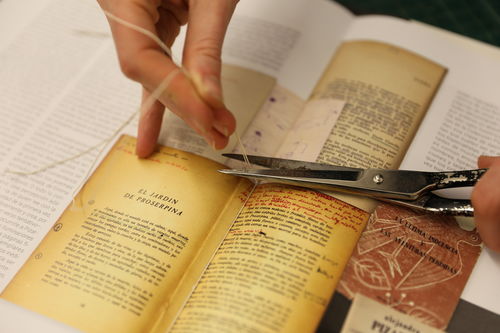 Cut excess thread.
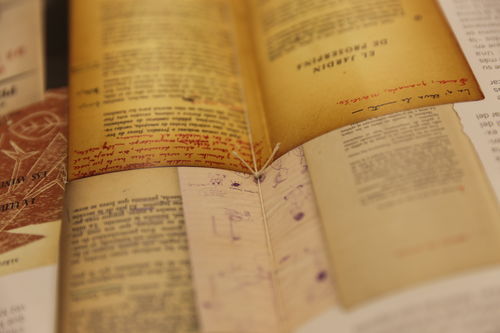
Finished:
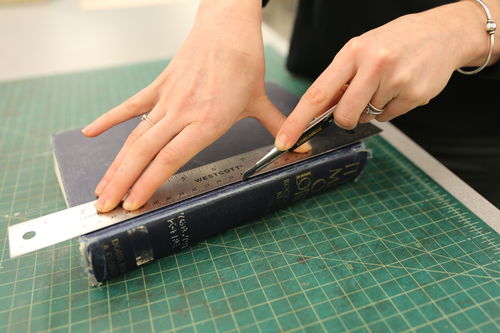
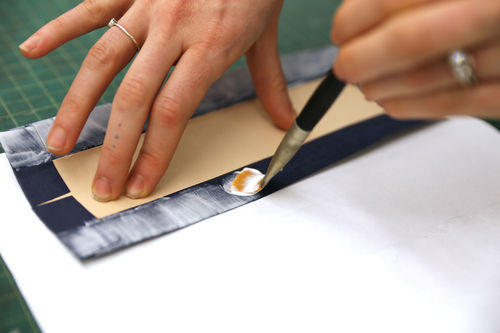
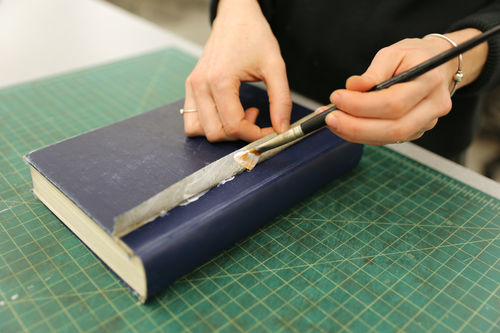
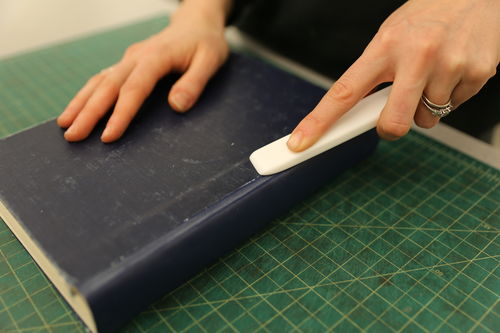
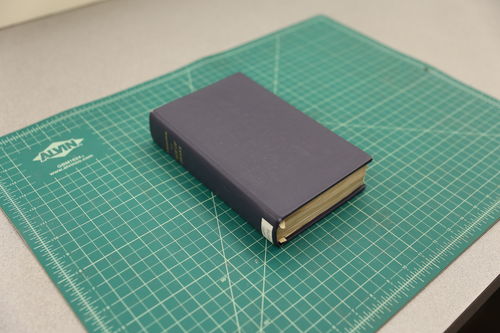
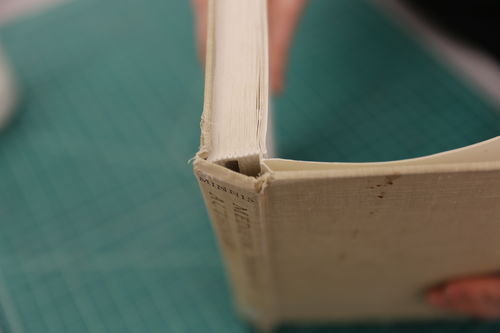
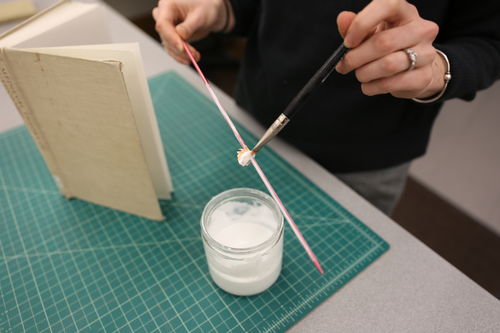
Spine Repair
Suggested Equipment and Supplies
Procedure:
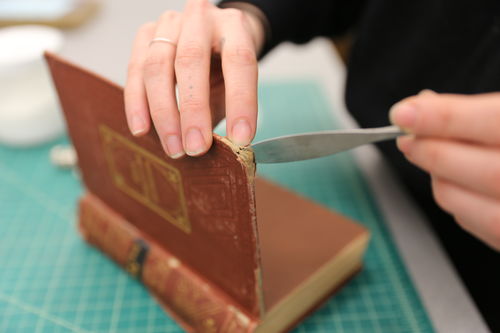
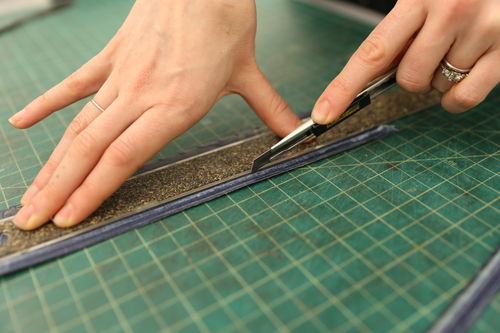
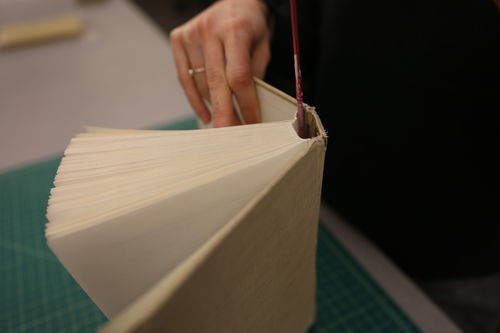
- 1.
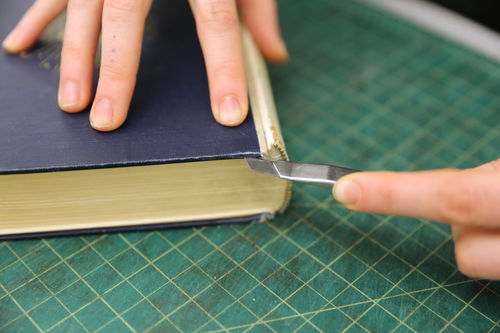
Using the scalpel and straight edge remove the original spine by carefully cutting through the book cover cloth just 1/8" past the hinge. Do this to both the front and back covers.
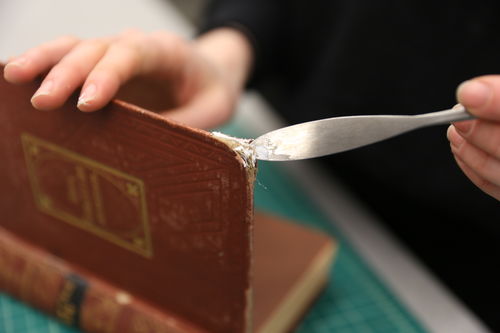
- 2.
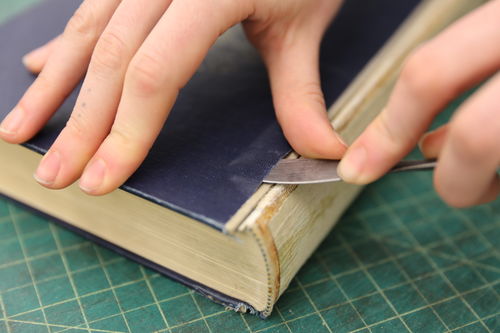
Cut into the cloth at the head and tail board edge closest to the spine to allow cloth to be lifted.
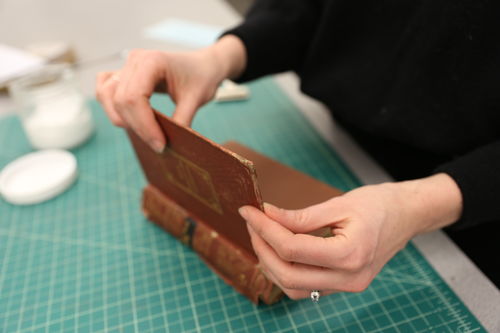
- 3.
Using the microspatula, gently lift the bookcloth on the cover approximately 1 inch away from the book hinge.
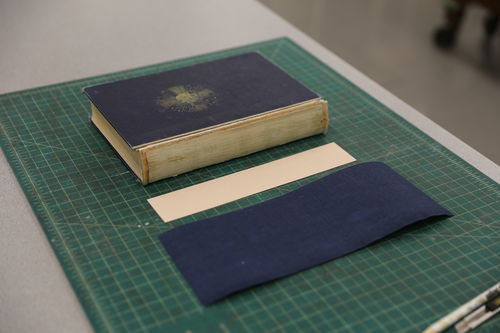
- 4.
To create the new spine piece cut a piece of the .10 point card stock the height of the book's boards and the width of the spine. The grain (see Parts of a Book) must run parallel to the spine.
- 5.
Cut a strip of matching bookcloth 2 inches wider and 1 inch longer than the new spine piece.
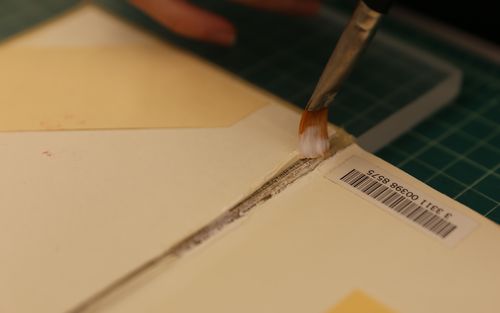
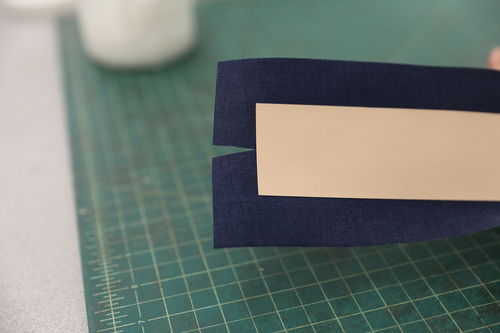
- 6.
Glue the spine piece with PVA, center it on the bookcloth, and rub down in place.

- 7.
Make a ‘V” cut at the center of the bookcloth at each end (head and tail) just up to the spine piece.
- 8.
Glue down head and tail ends with PVA bringing the sides of the “V” cut together. This will create a slight arc to the fold.


- 9.
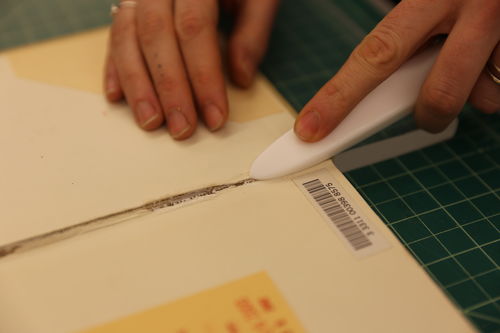
Shape the new spine piece with your bone folder until it curves slightly.
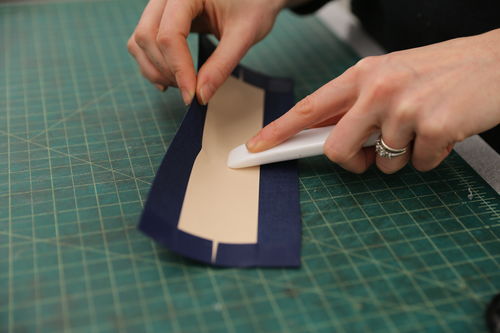
- 10.
Dry fit new spine piece into the joint area before gluing. This helps guide the new spine into place while gluing.
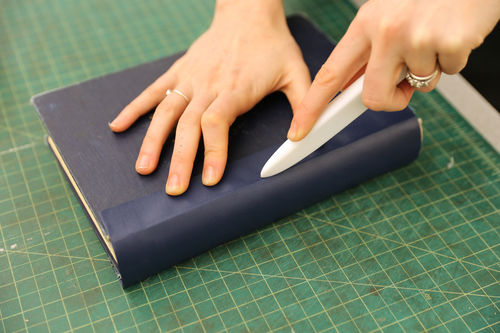
- 11.
Glue the exposed cloth on the sides of the new spine piece and attach to the book . Center and rub the new spine in place under the lifted cover bookcloth.
- 12.
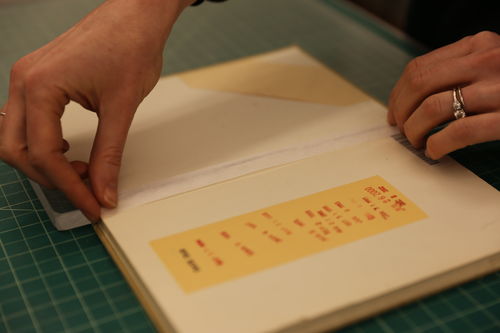
Using your folder carefully mold the cloth down into the joints and onto the boards underneath the lifted cloth.
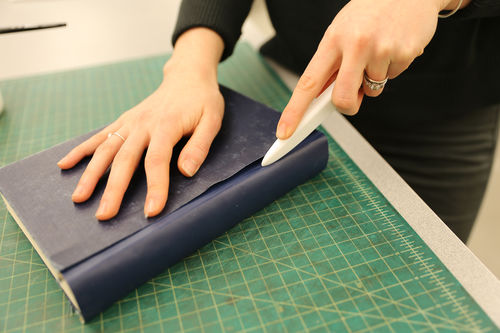
- 13.
Nip the book for a few minutes between press boards if available.
- 14.
Put PVA on the lifted cover cloth and press down.
- 15.
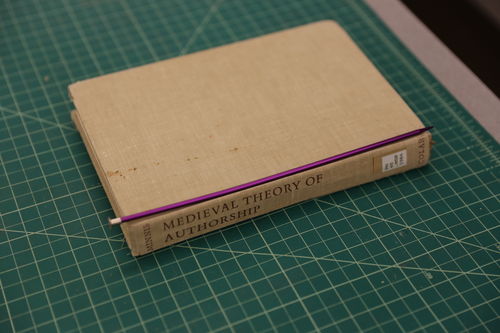
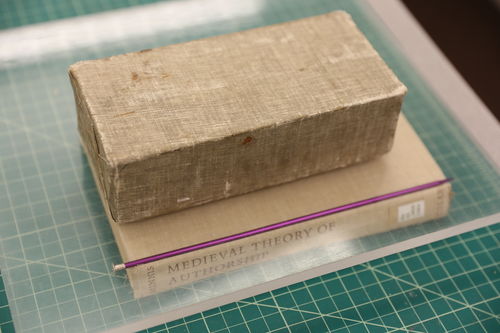
Take the original spine and remove any loose backing material.
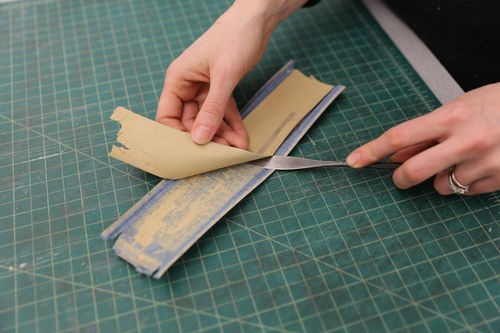
- 16.
Trim any frayed edges on the four sides avoiding any text.
- 17.
Mount the original spine onto the new spine.Note: If the original title on the spine is extremely faded, print out a label with the title on acid-free, alkaline buffered paper. Use the label instead of the original spine.


- 18.
Put book under weights to dry.
Finished:
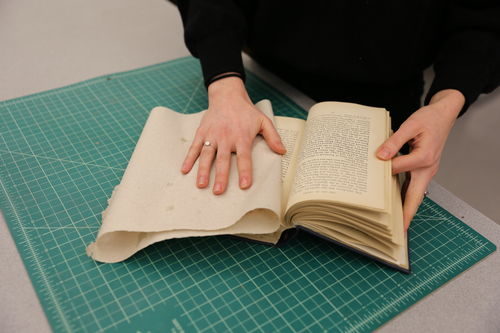
Air Drying Wet Books
Ideally, wet books should be freeze dried then treated. This procedure outlines
what to do when the book is not totally soaked or freezing is not practical.
Some papers may dry as a solid block if not dried in a timely manner. Mold can
develop within 48 hours even on damp books, so immediately addressing wet books
is critical.
Suggested Equipment and Supplies
Procedure:
- 1.
Blot as much water as possible using paper towels or blotter. Be careful not to rub either the cover or the wet pages.
- 2.
Stand the book on its tail and fan open the pages. If possible dry the book in this position in the sunlight or with the use of a fan. Alternatively, dry the book in a warm dry area away from a direct heat source. The more quickly the book dries the less cockling (rippling) will occur.
- 3.
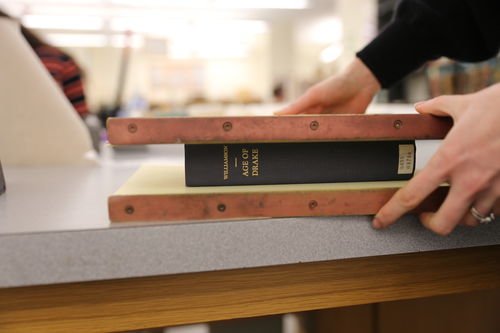
If after drying the cover is warped, place the book between two press boards and place in a book press for several days.
- 4.
Unfortunately, a wet book that has been air dried will never look as good as it once did but it will be dry.
Finished:
Hinge Tightening
Link to Video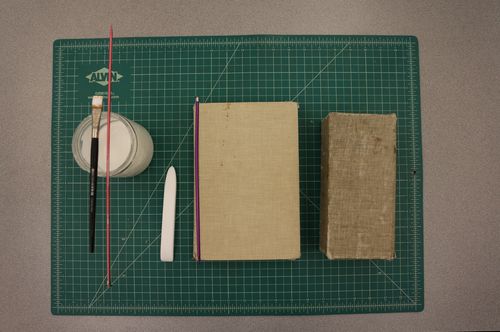
Suggested Equipment and Supplies
Procedure:
- 1.
Place the book upright with cover open, exposing the inside of the hinges.
- 2.
Dip the knitting needle into the adhesive and coat. Insert the needle into the hinge area and roll it into the joint. Be careful to put glue only into the hinge area, or the book will not open properly.
- 3.
Lay the book flat and bone in the hinge on the outside cover of the book. Apply pressure with the bone folder, but be careful not to tear the bookcloth. Immediately wipe away any glue that oozes through the bookcloth with a damp sponge or paper towels.
- 4.
Repeat steps for the other hinge if necessary.
- 5.
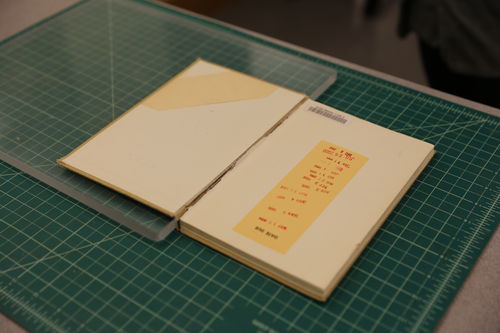
Place the book on a hard clean surface. Place a knitting needle in each joint.
- 6.
Place a clean board over the book and a brick on top of the board. Note: For the purpose of illustration clear plexiglass is used to show the position of the needle under it.
- 7.
Let repair dry for thirty minutes.
Finished: